Project Setup
Set up your project API key, request logging, BYOK providers, activity logs, security, and model usage.
This guide walks through the main project tabs so you can configure access, logging, providers, security, and usage visibility from one place.
To get started, navigate to Dashboard > Application > Projects and open the project you want to configure.
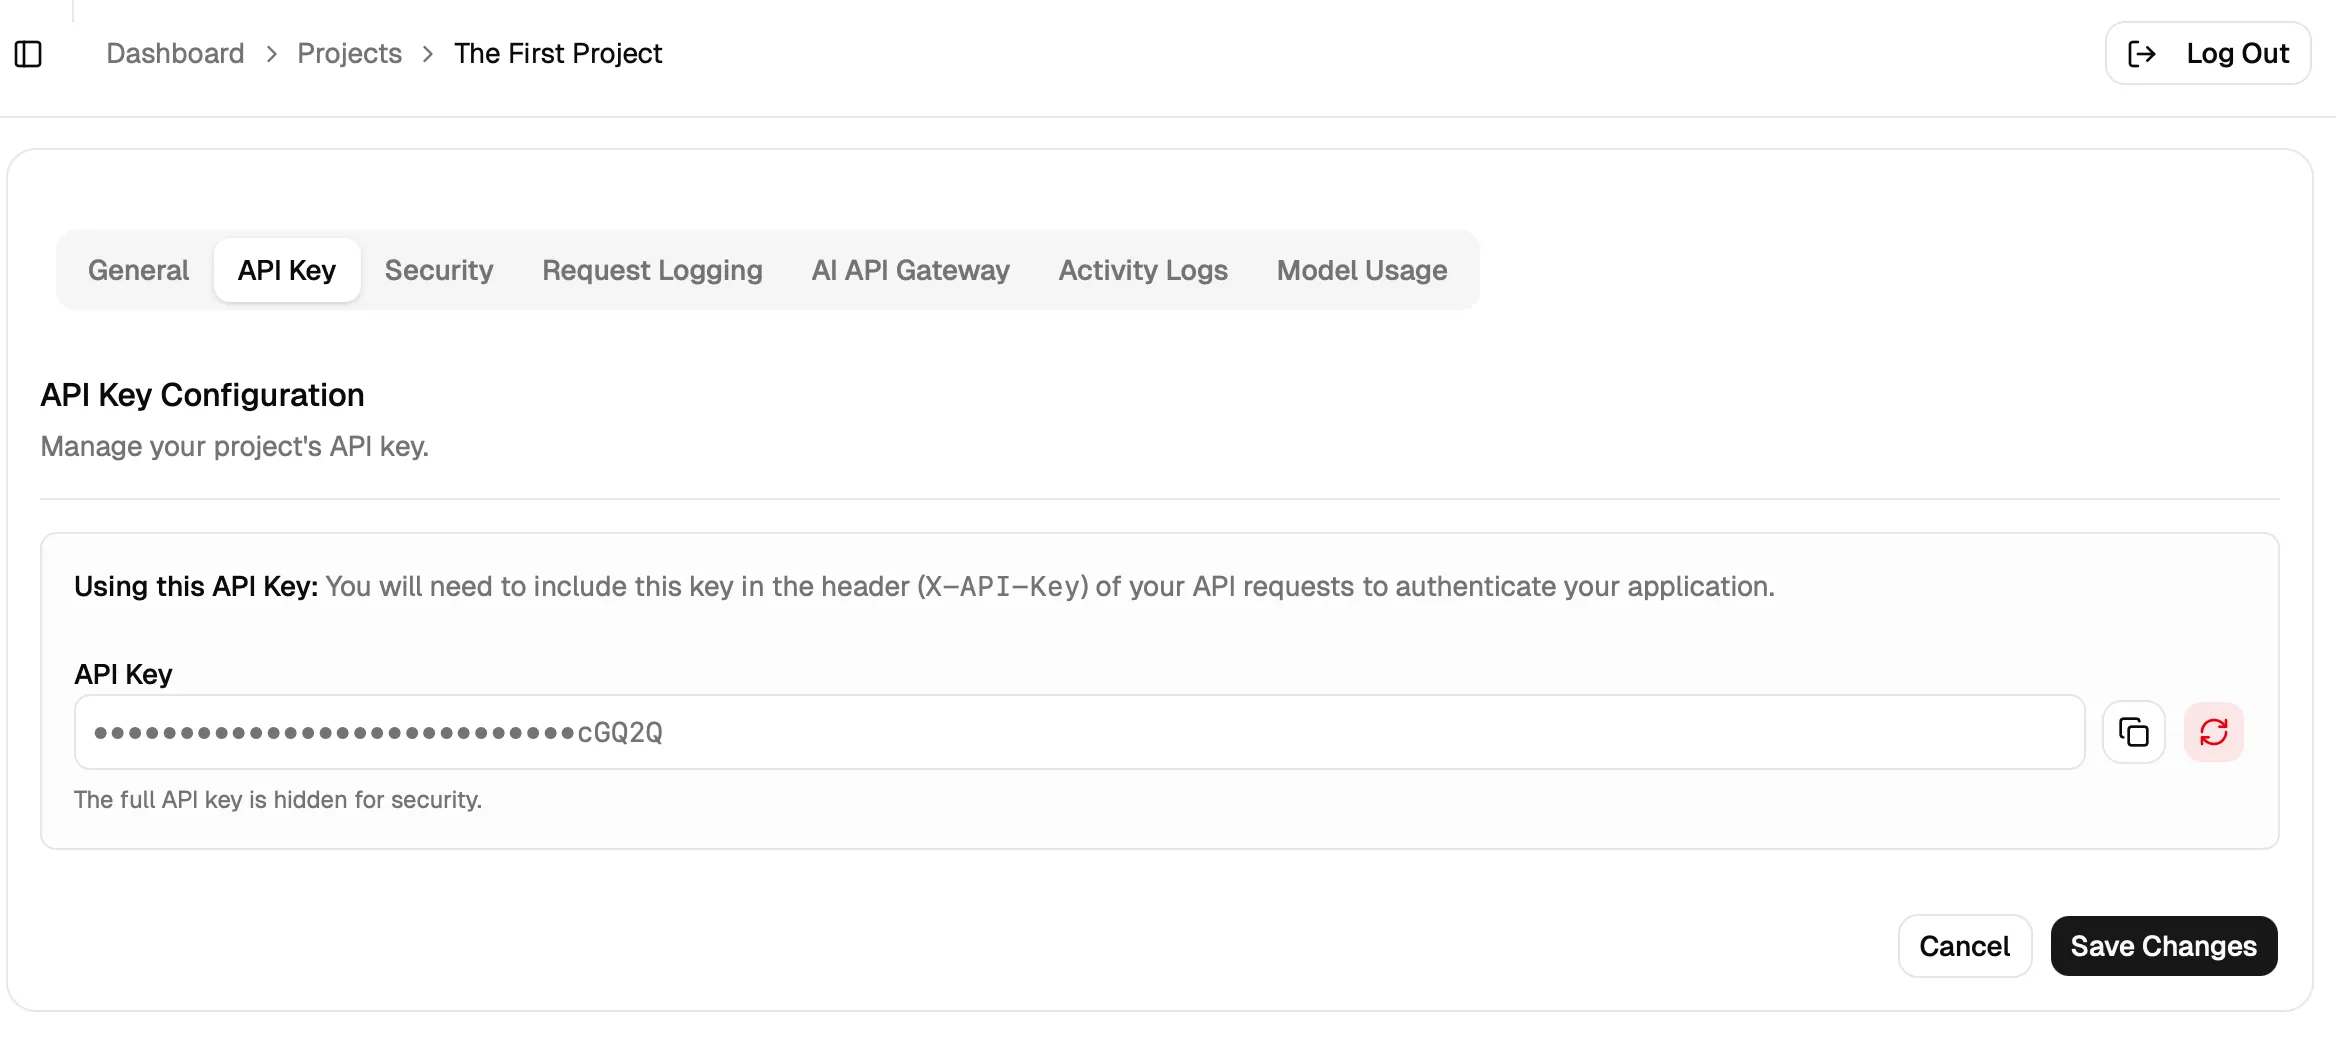
1. API Key
Open the API Key tab to manage the key used by this project.
- ➝ The project API key is shown in masked form for security.
- ➝ Use the copy action when you need to authenticate requests from your app.
- ➝ Use the refresh action if you need to rotate the key.
- ➝ Save changes after updating the key configuration.
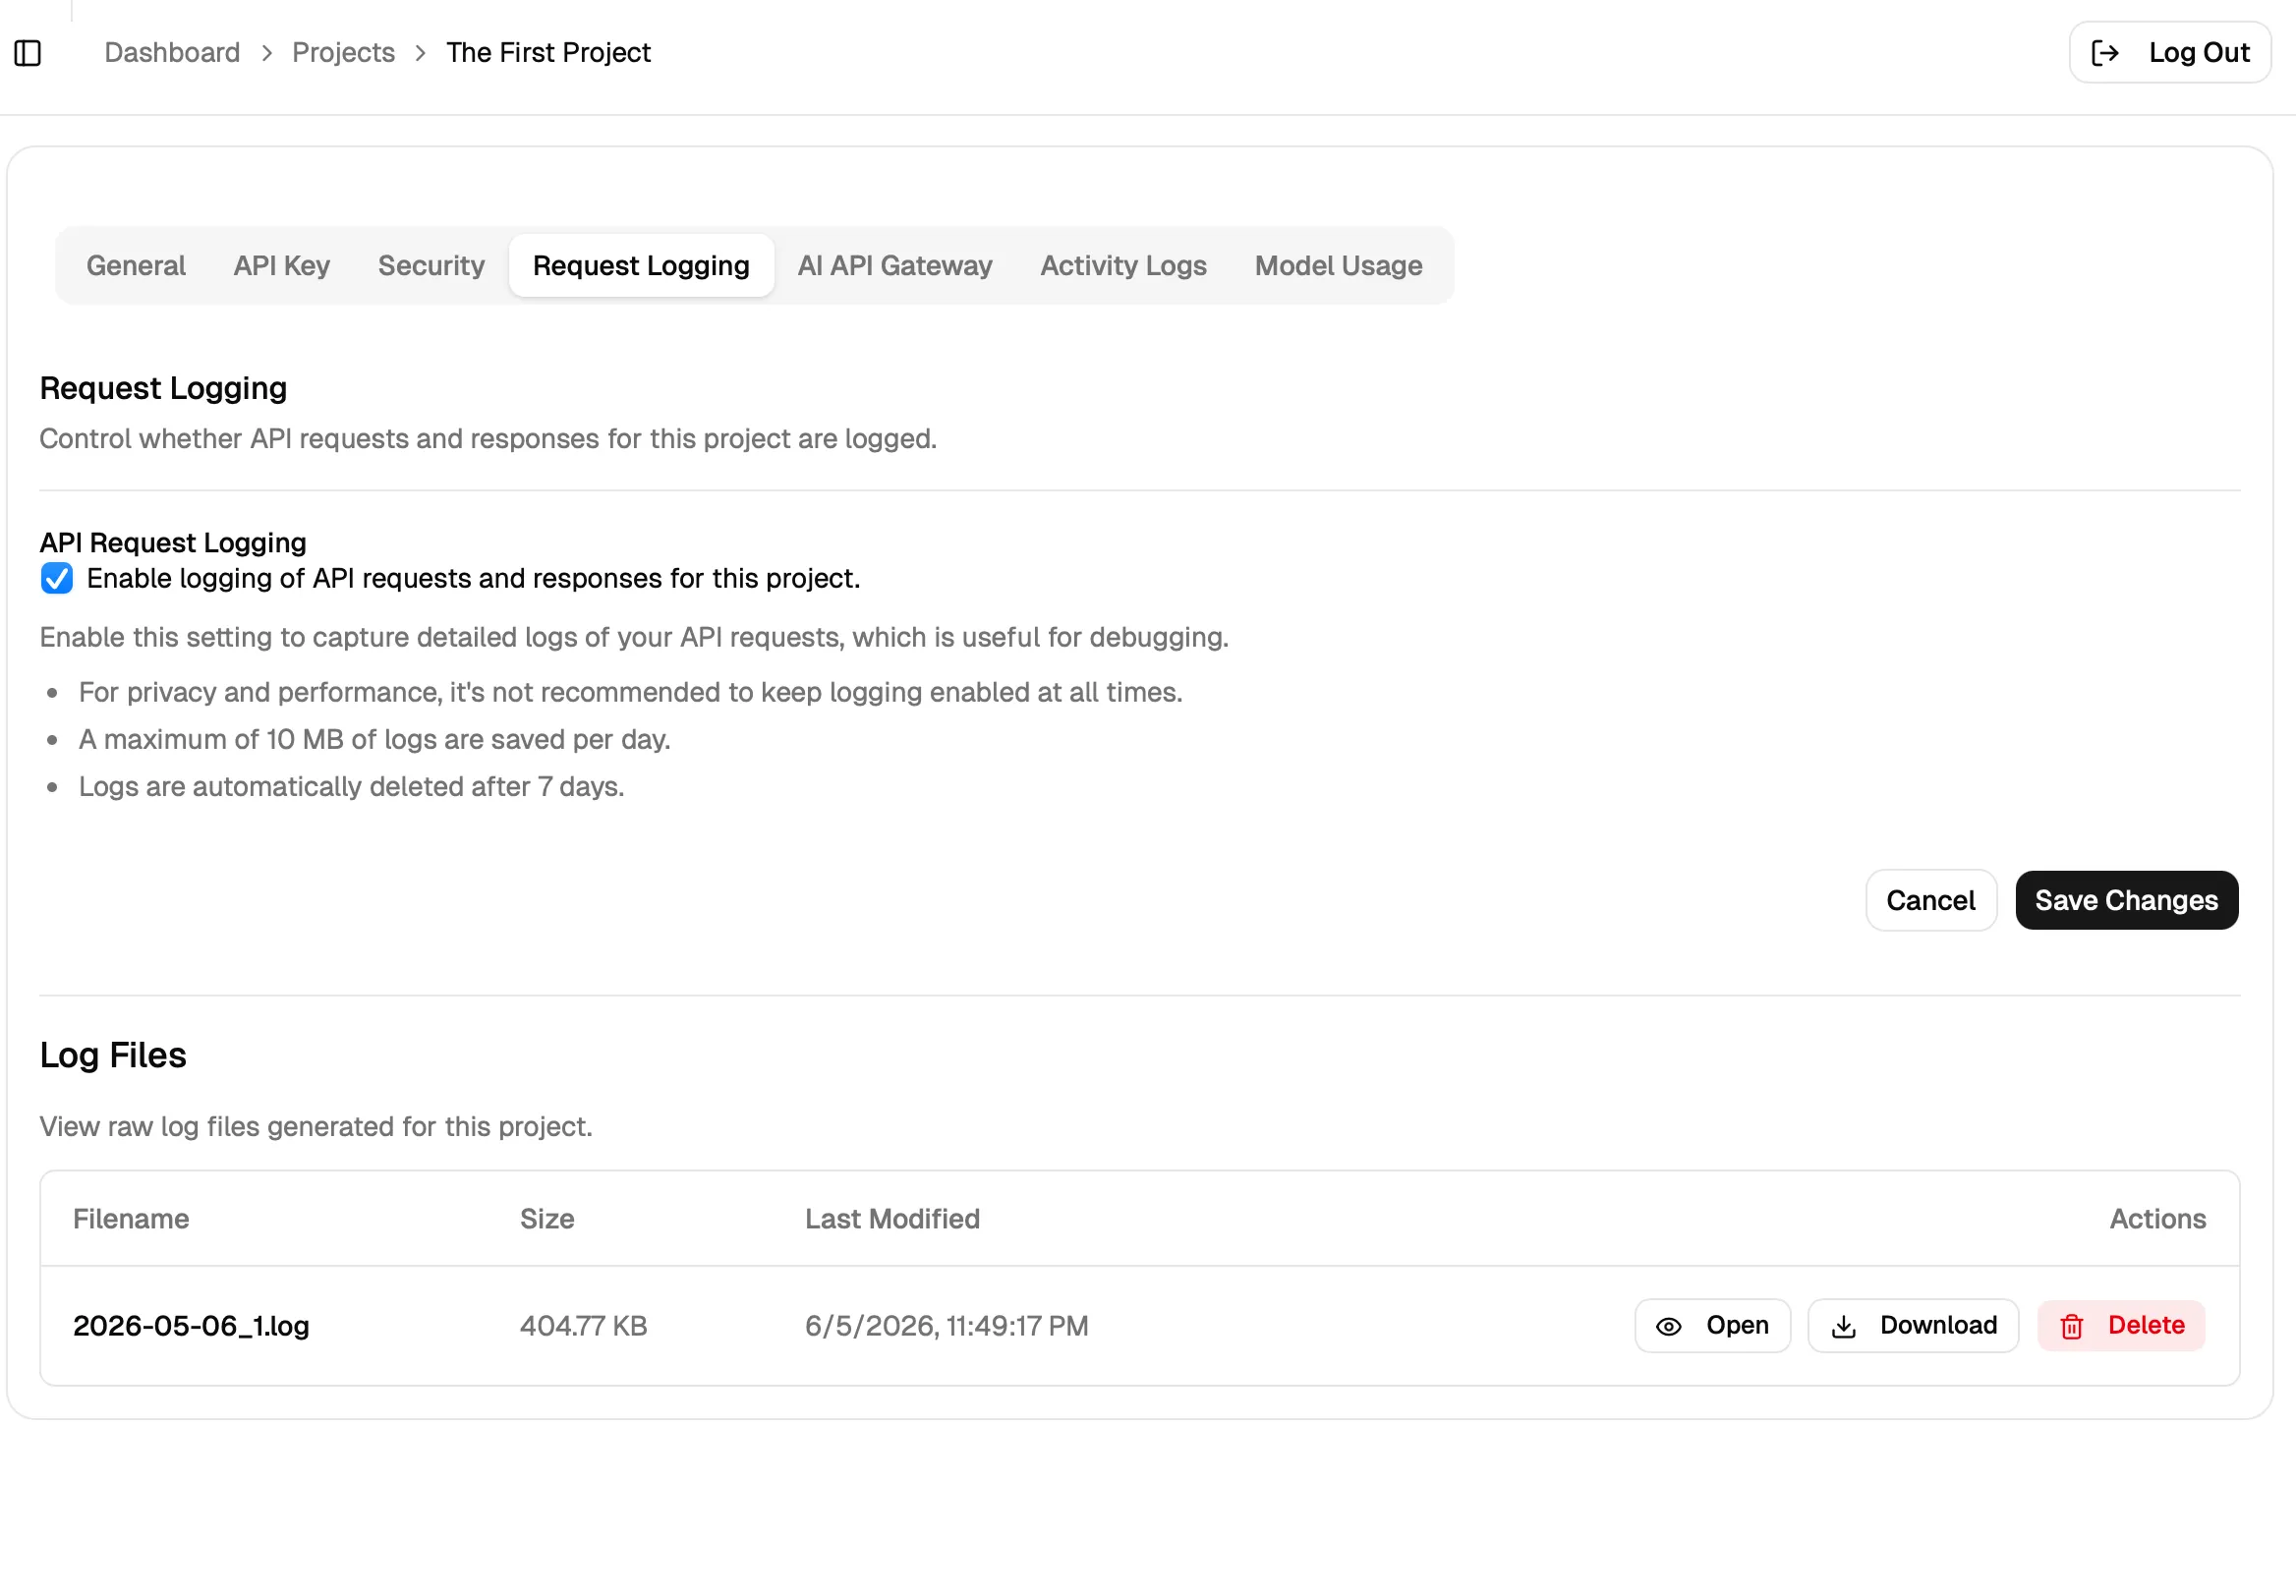
2. Request Logging
Open Request Logging to control whether request and response logs are stored for this project.
- ➝ Enable logging when you need better debugging visibility.
- ➝ Review the retention notes shown in the dashboard before leaving logging on for long periods.
- ➝ Use the log files section to open, download, or delete raw log files generated for the project.
3. Provider Setup
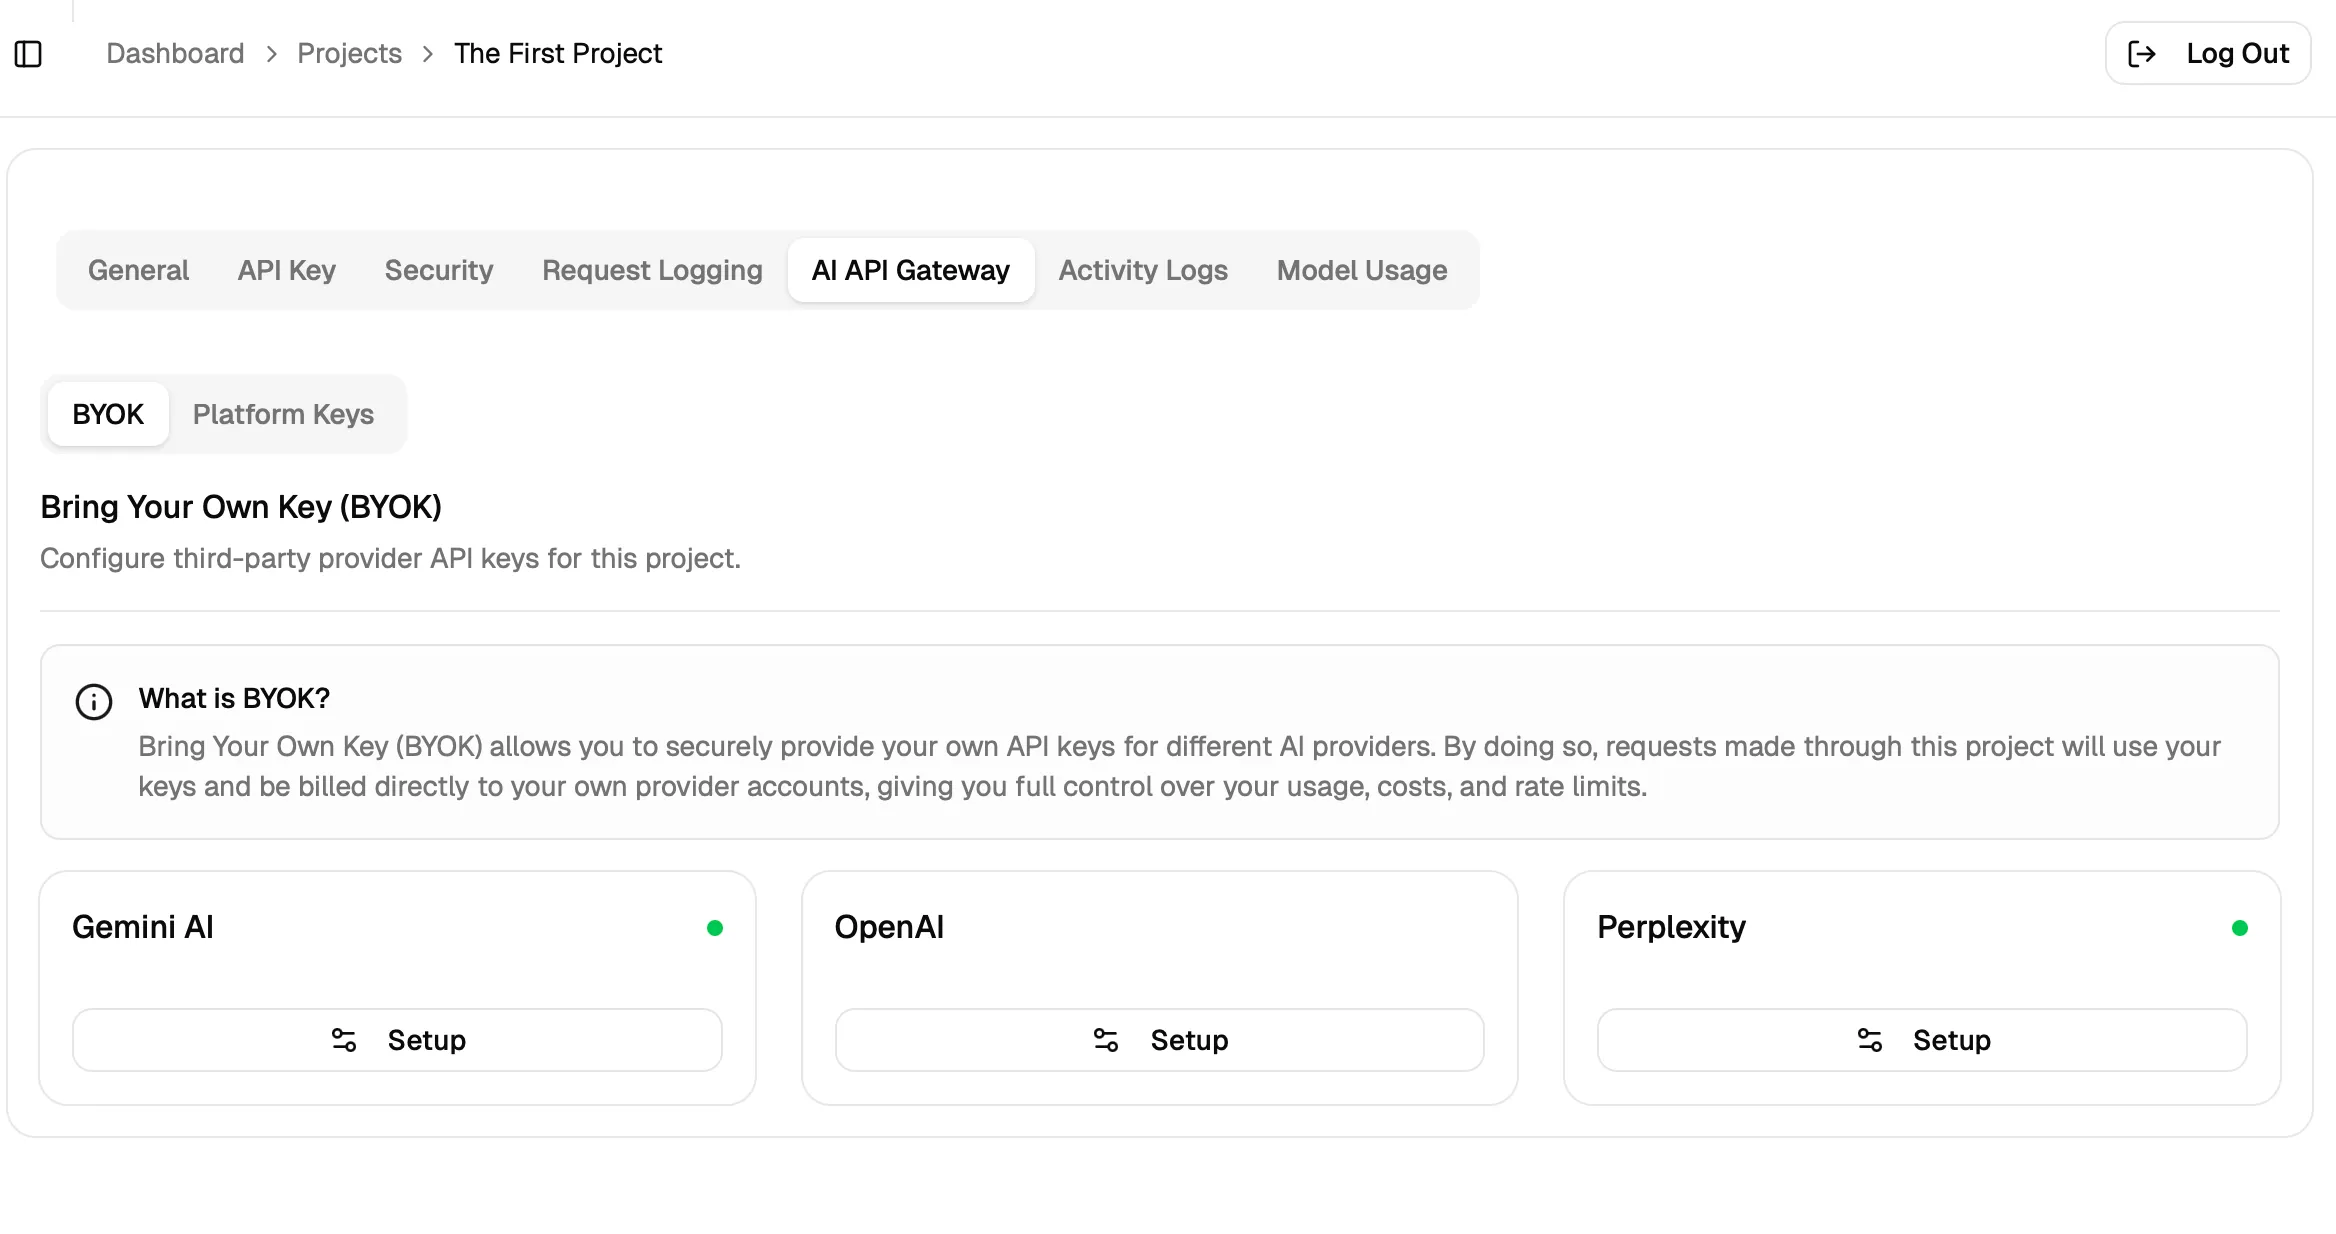
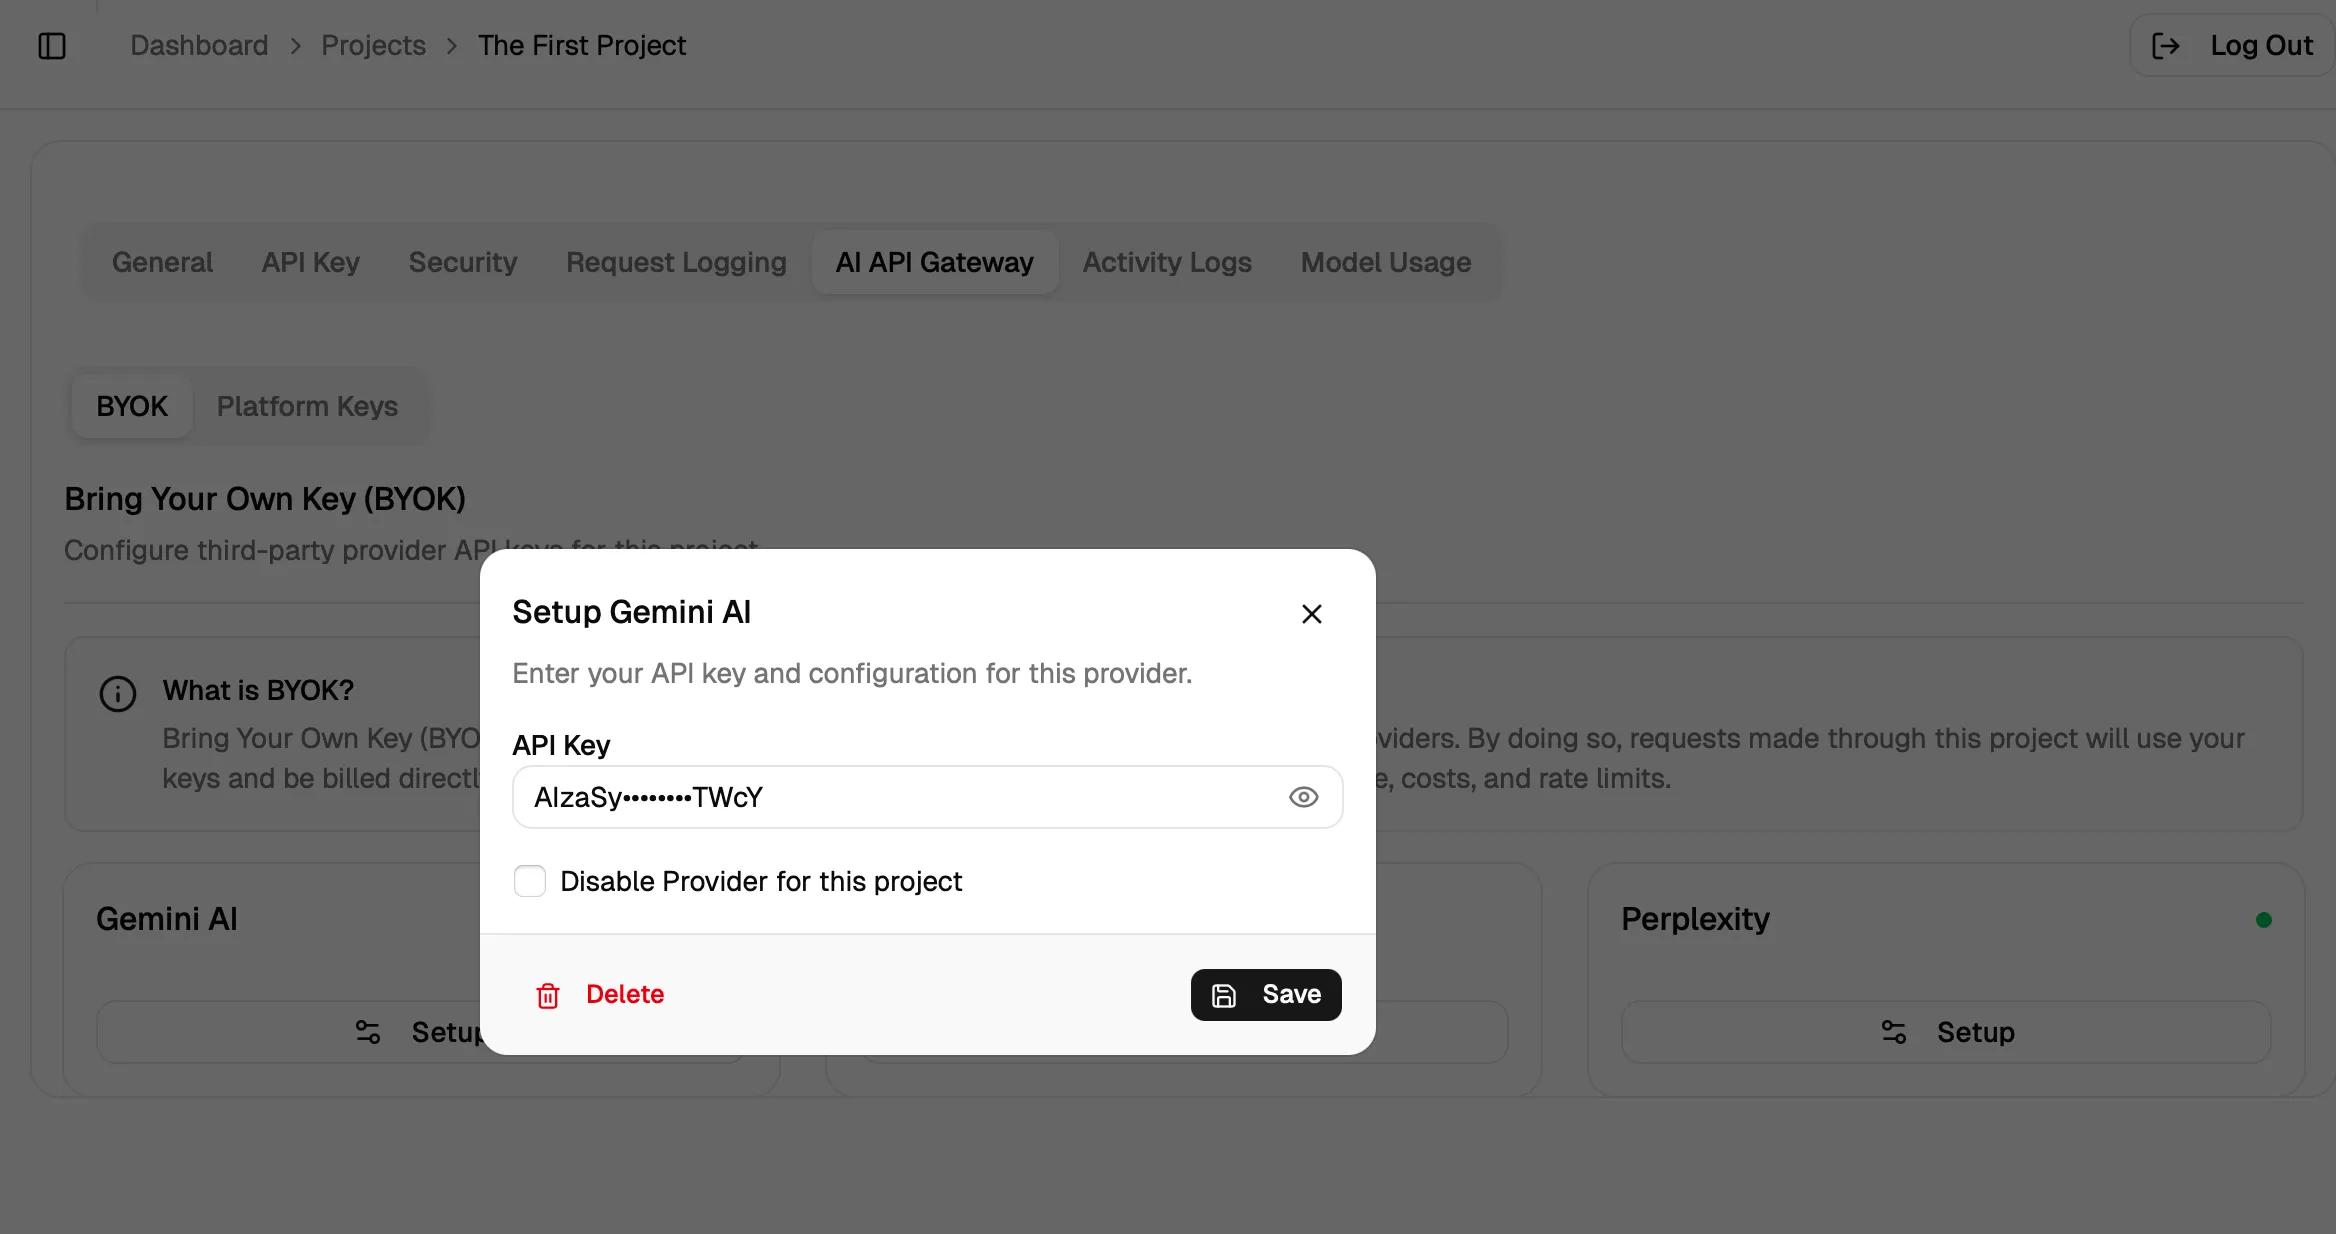
Open AI API Gateway > BYOK to configure your provider keys for this project.
- ➝ Select BYOK to manage third-party provider API keys.
- ➝ Choose the provider you want to configure.
- ➝ A green status dot indicates the provider is set up for the project.
- ➝ Click Setup to add or update a provider key.
- ➝ Use the provider dialog to save changes or delete an existing configuration.
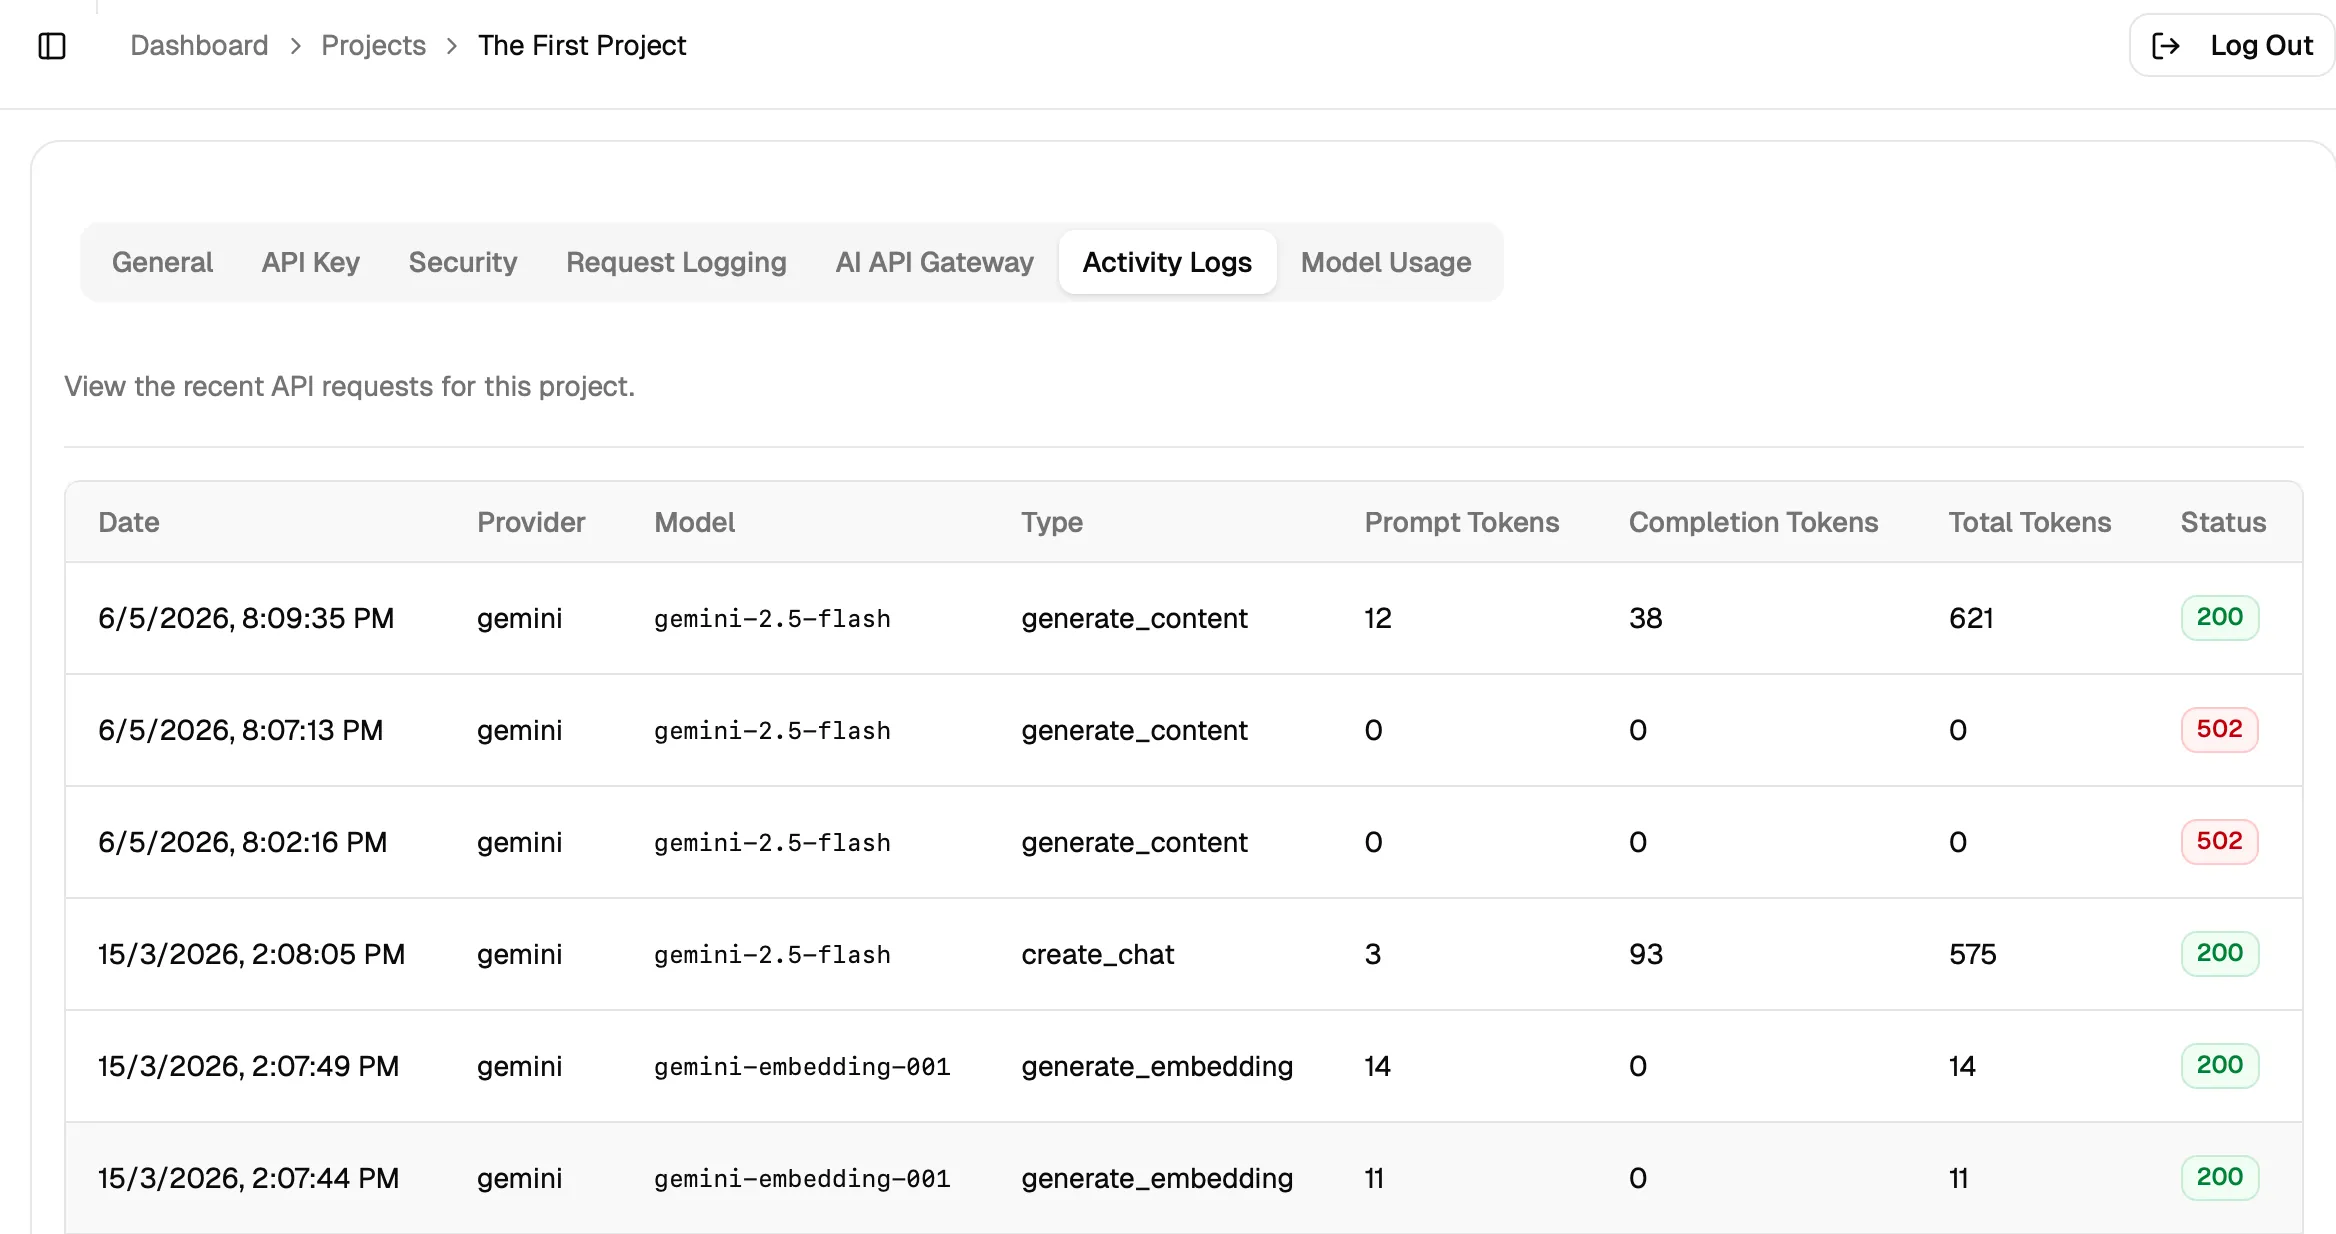
4. Activity Logs
Open Activity Logs to review project-level request activity.
- ➝ This table helps you inspect request history across providers and models.
- ➝ You can review request type, token usage, and response status from one place.
- ➝ This section is especially useful when you need to trace recent failures or confirm successful traffic.
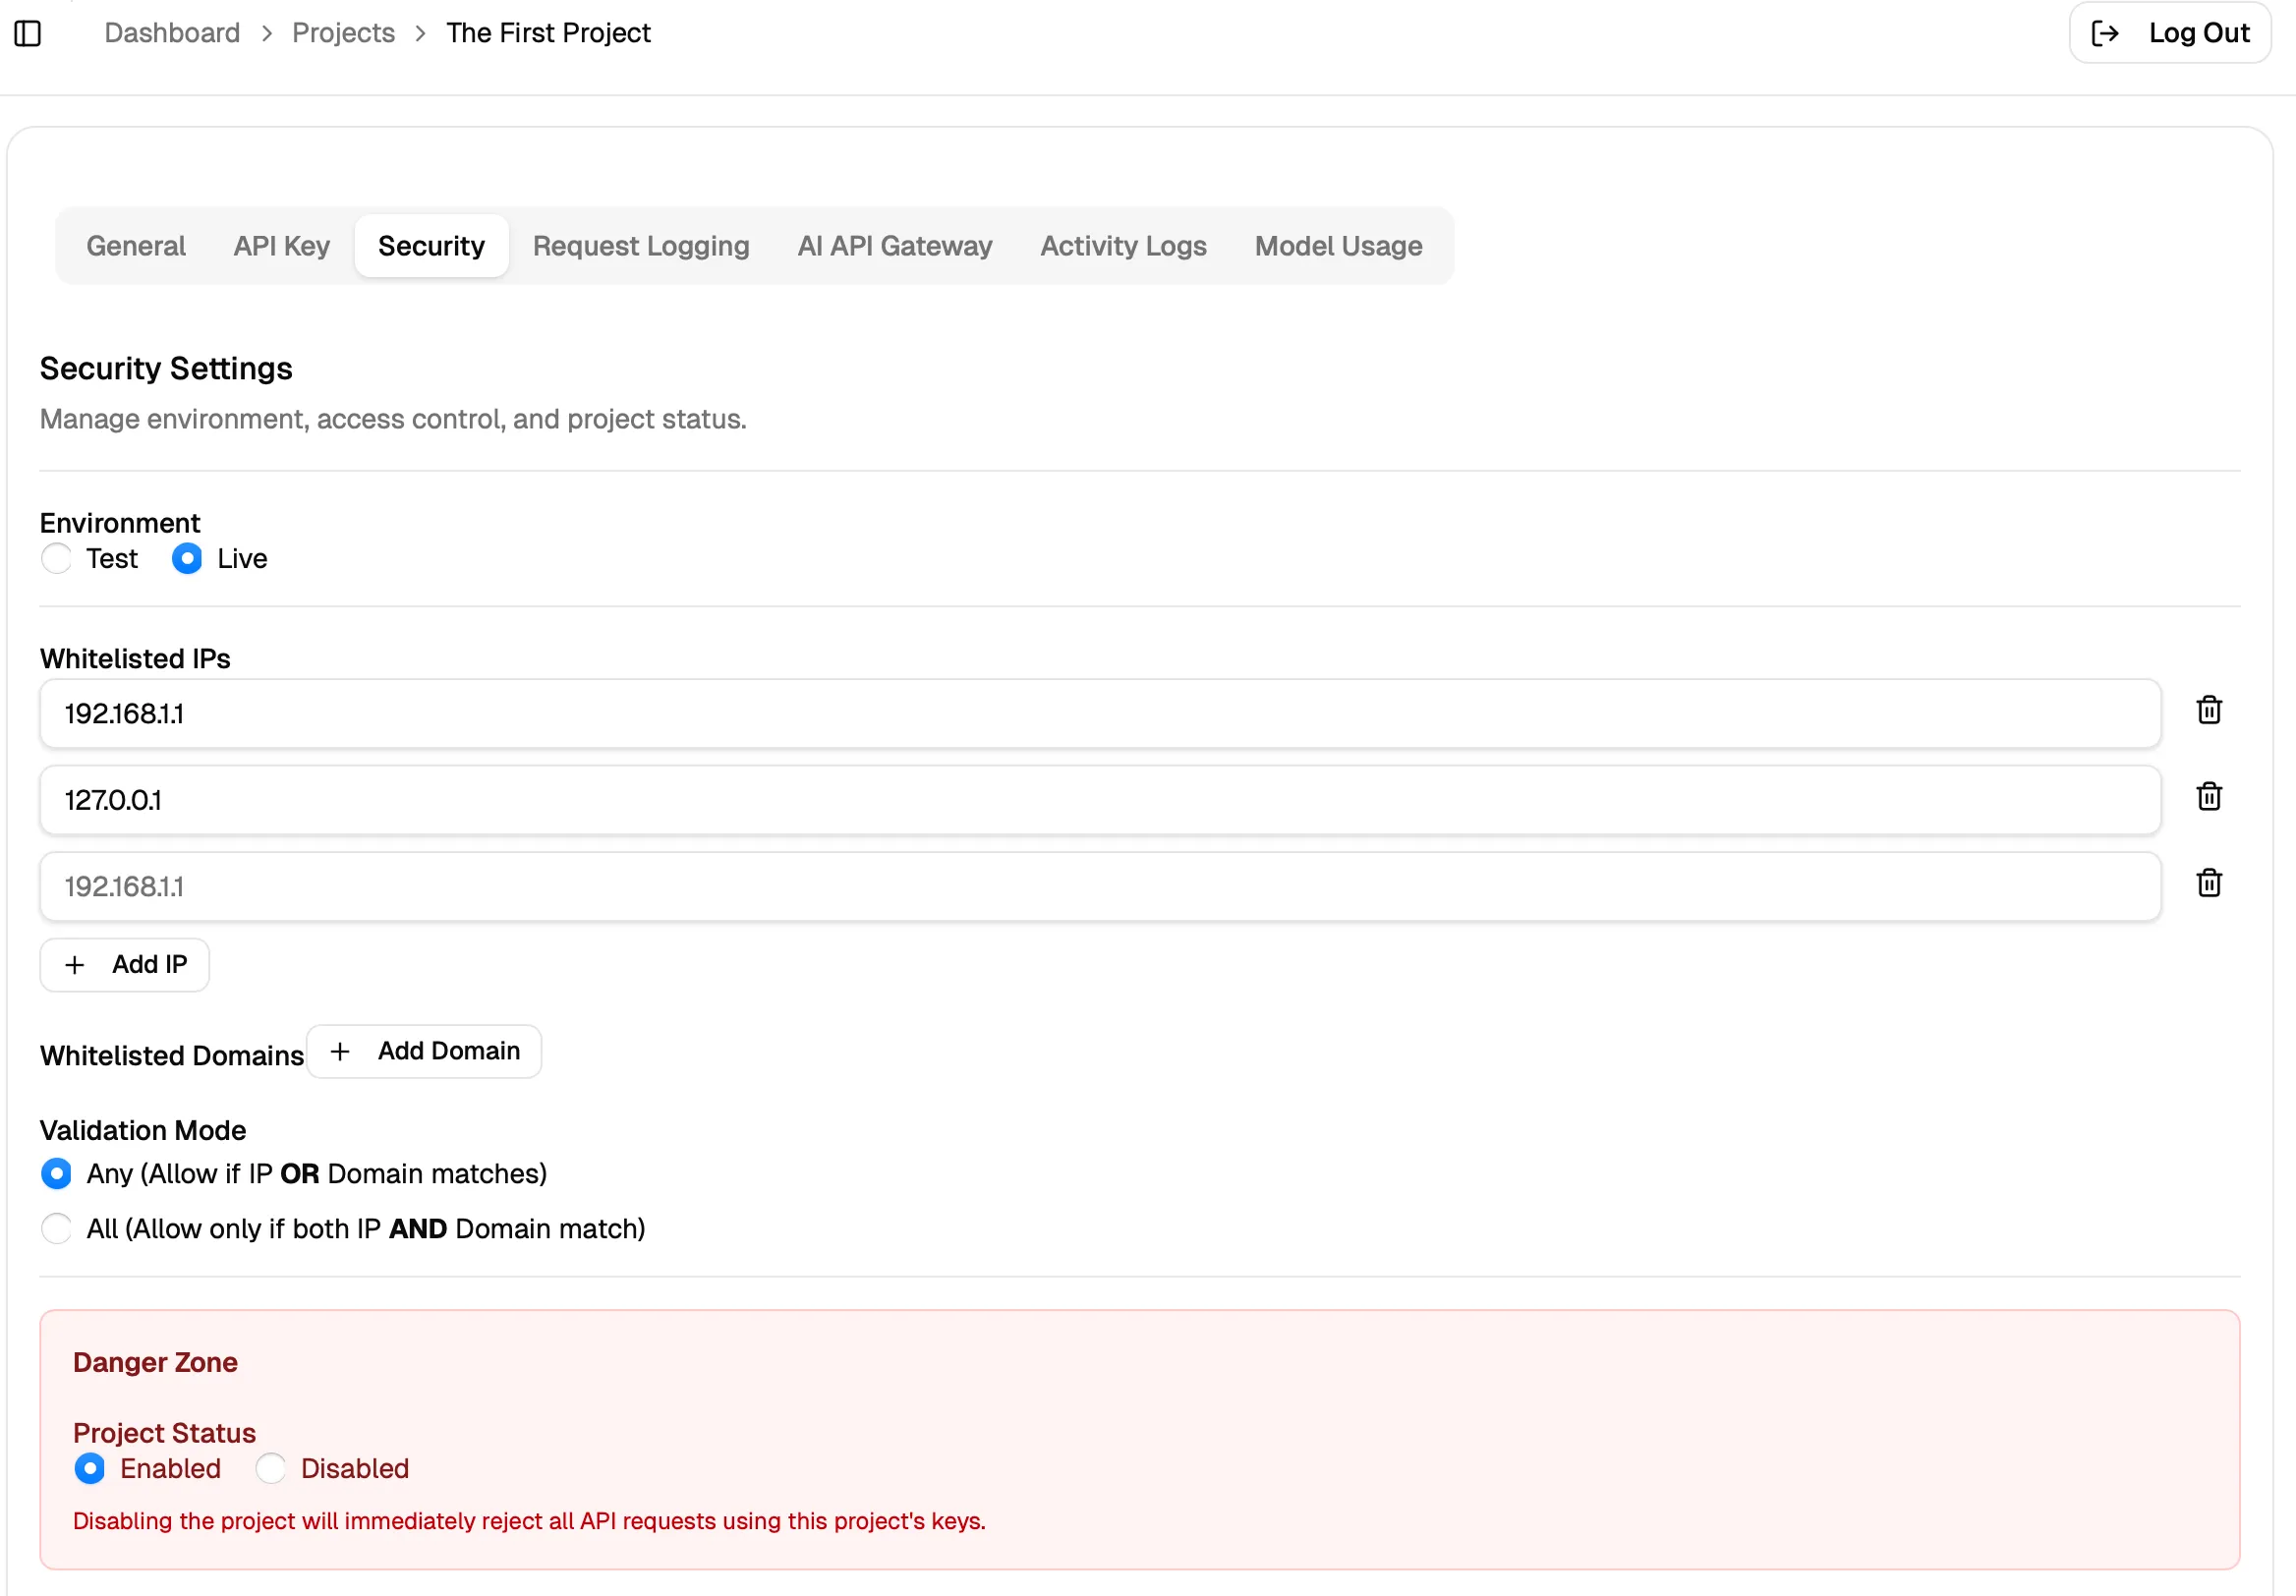
5. Security
Open Security to manage environment settings, whitelisted IPs, whitelisted domains, and project status.
- ➝ Add trusted IP addresses to control which sources can access the project.
- ➝ Add trusted domains where needed for your application flow.
- ➝ Choose the validation mode that fits your access policy.
- ➝ Use the danger zone carefully when enabling or disabling the project.
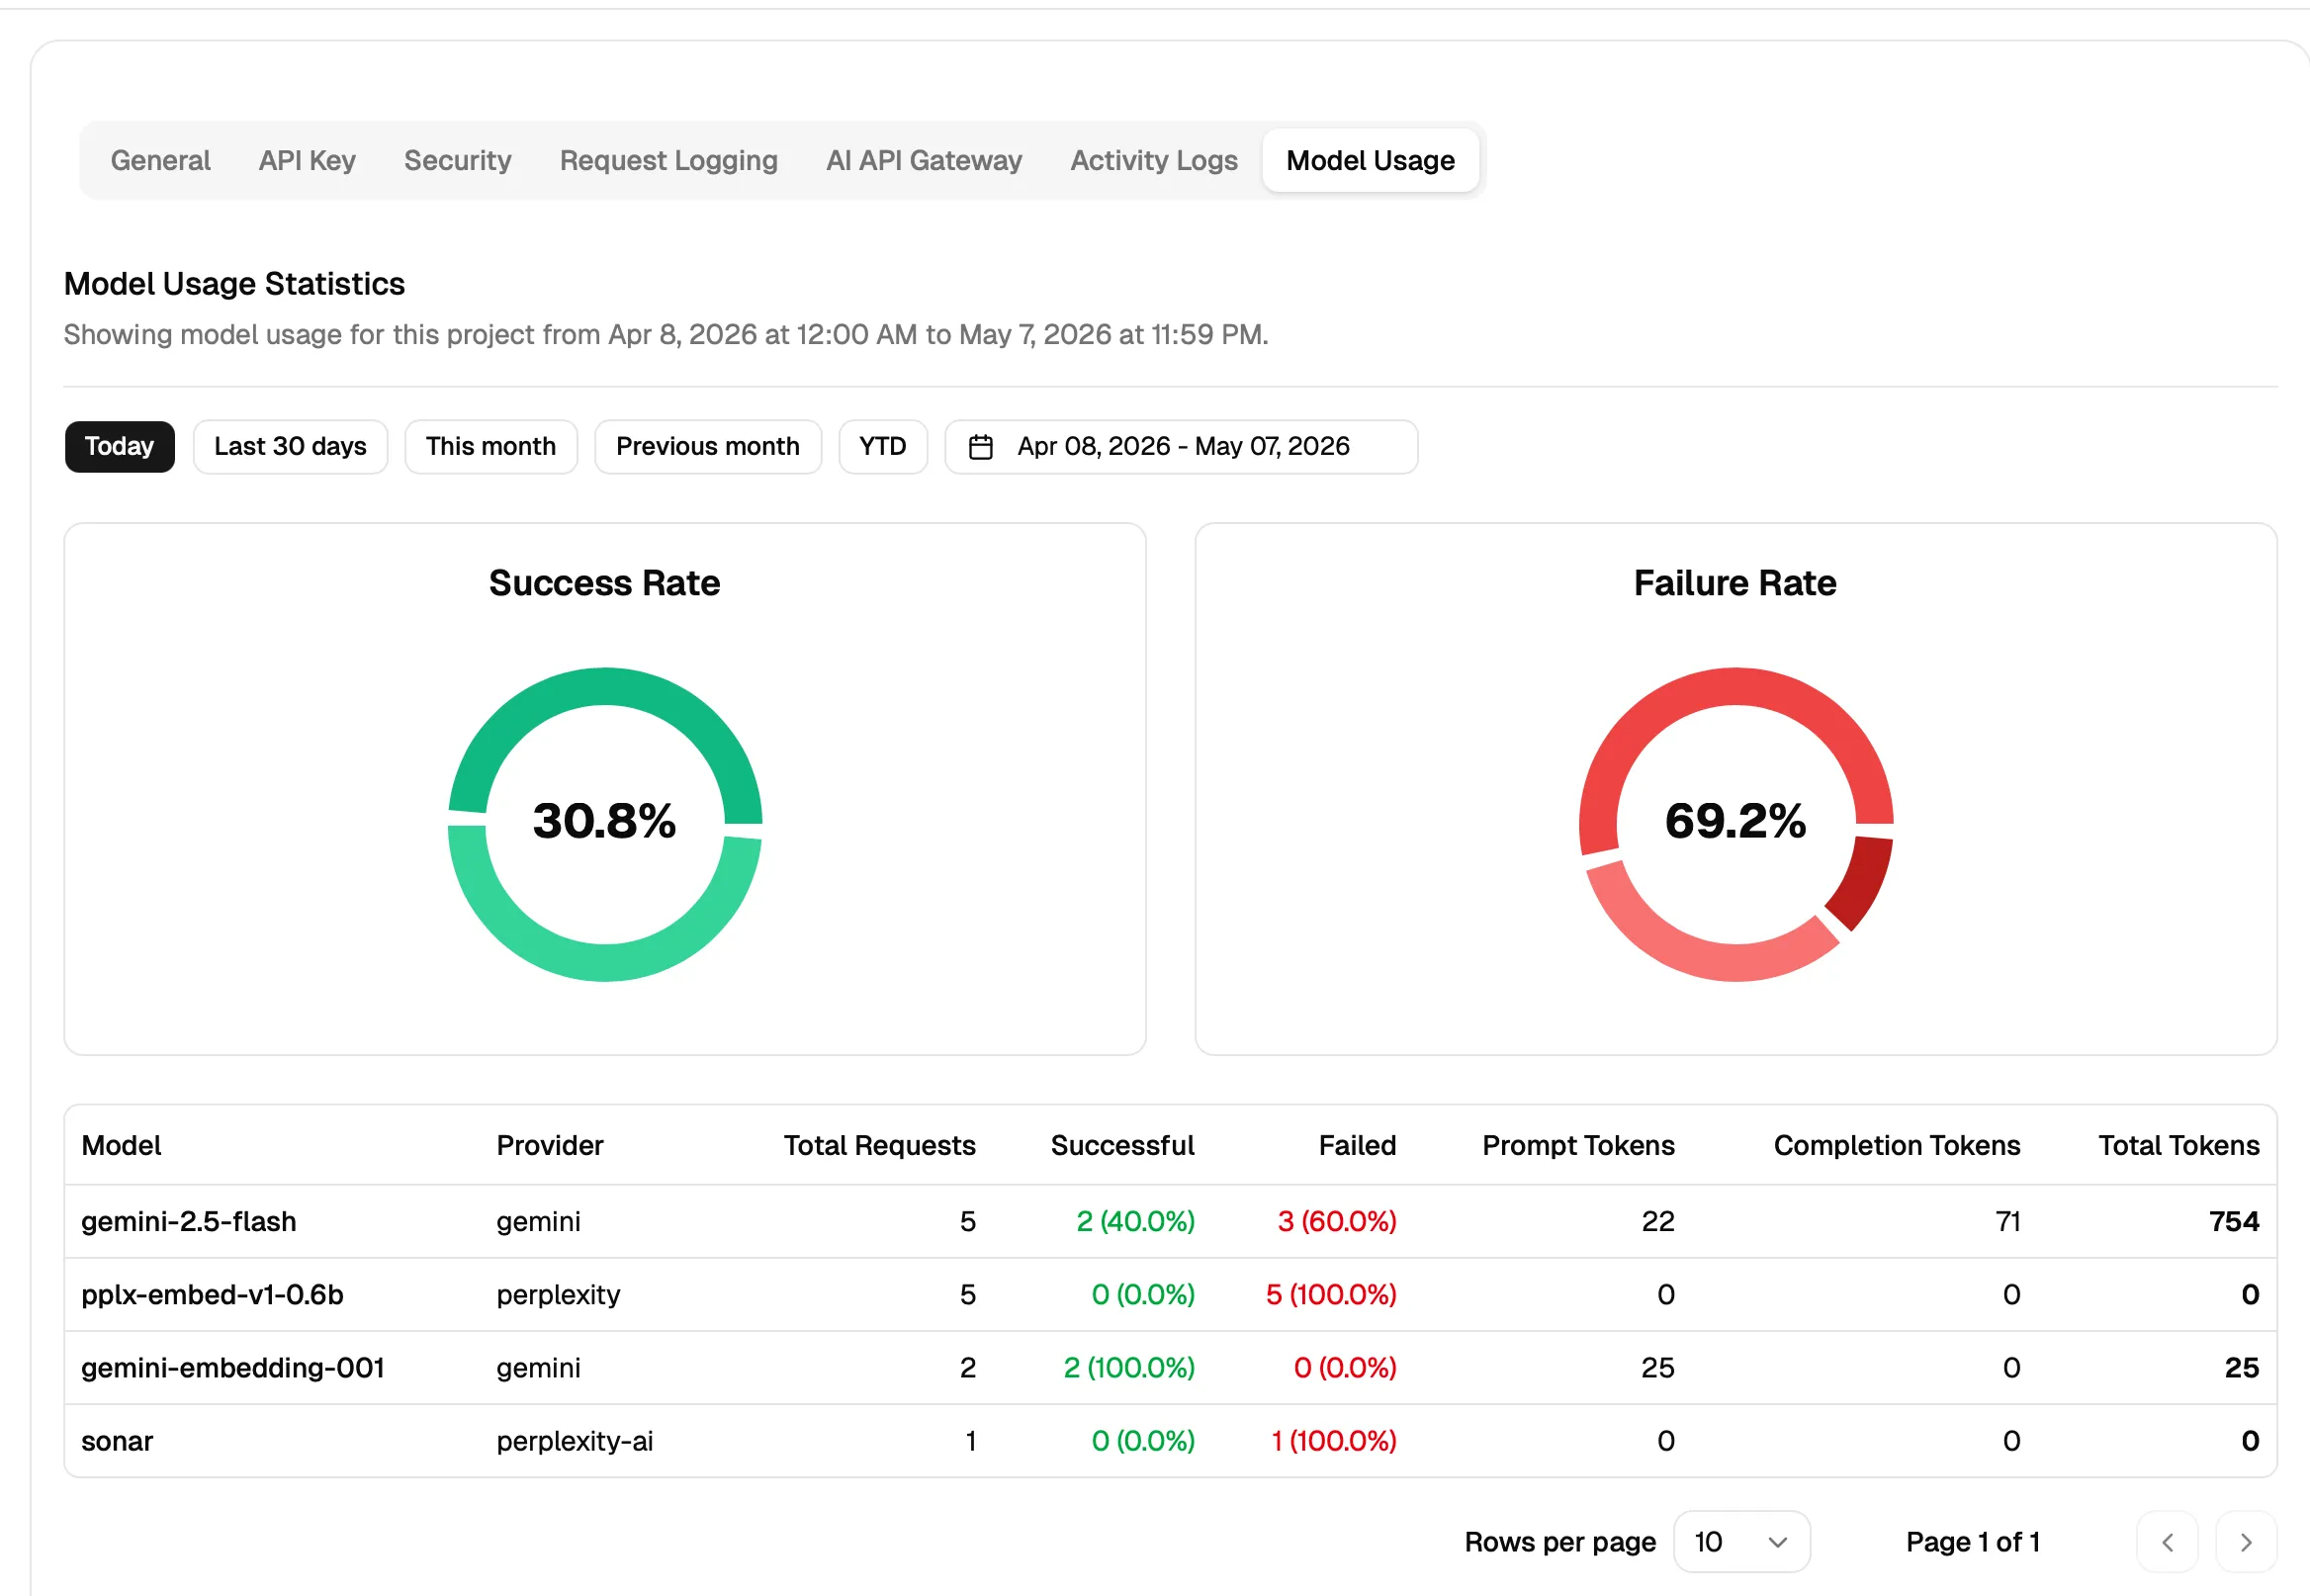
6. Model Usage
Open Model Usage to understand how the project is performing over time.
- ➝ Use the date filters to inspect a specific time window.
- ➝ Review success and failure rates at a glance.
- ➝ Compare models, providers, total requests, and token usage in the usage table.